Fiat Bertone x1/9
Greek Club
Fiat Bertone x1/9
Greek Club
Fiat Bertone x1/9
Greek Club
|
e-mail:
|
A/C Air Condition System On Fiat Bertone x1/9 Many Fiat x1/9 owners want to add an A/C system to their car, and the most of them don't know that this car had an edition with Factory A/C. Those cars where delivered to the USA in the eighties and A/C was fitted on 1.500cc models. This page will try to give as much info we have about this issue. Please note that adding an A/C system to a Fiat x1/9 is such a big job but not impossible.
Follow the next steps:
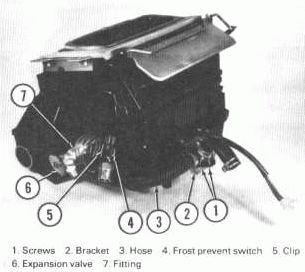
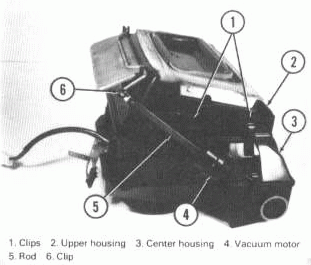
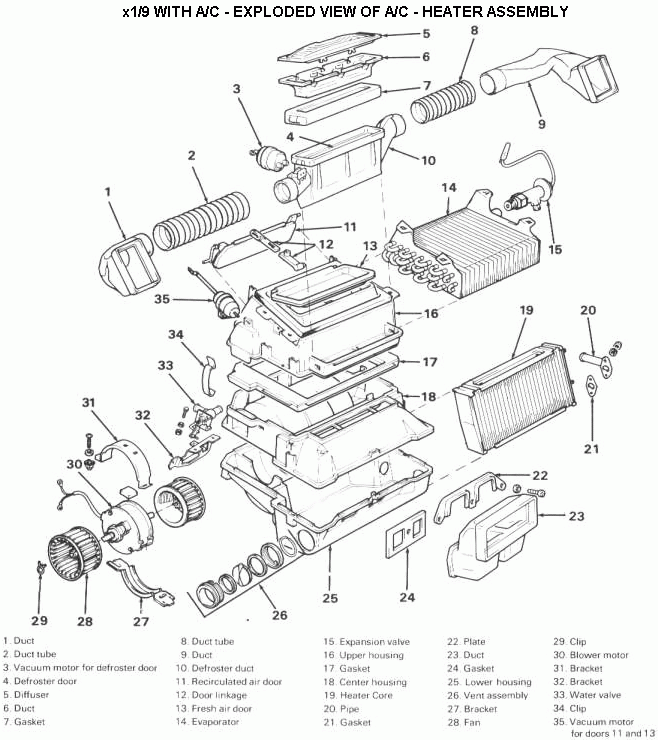
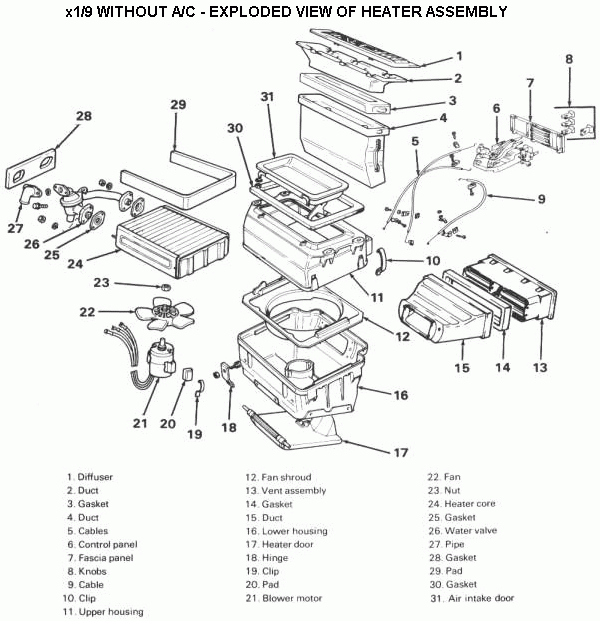
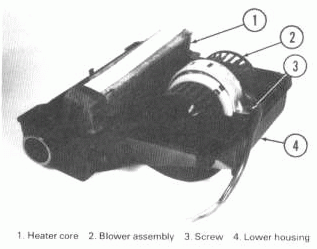
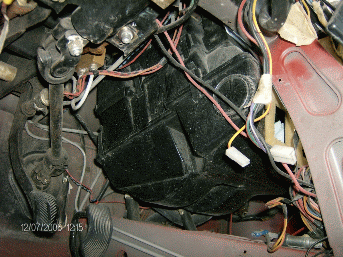
1. Find and Install a complete A/C and Heater Core Box This fits under the dashboard and this is the most difficult to find. The Box fits at a No A/C x1/9 exactly to the positions of the No A/C Heater Core Box. The author of this page found one used [a new one is out of question] from an American x1/9 owner, who had the box disassembled from a dismantled x1/9. You can place an add for this at XANA forum which is under www.seattlex19.org.
Note that the Blower Motor is exactly the same from a BMW model [the only difference is that the one from BMW has longer axis which does not need to be cuted]. A good car electric supplies shop will easily locate one to renew it [of course you must have the old one on hand so they can identify it].
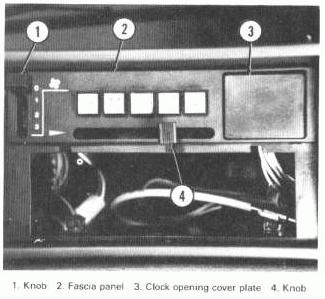
2. Modify the A/C - Heater Core Box Controls - Control Panel One of the most difficult parts, is to make the controls for the Core Box to work. This controls have to do with the Inlet and Directions of the Cold or Warm Air from the Core Box to the Cabin. The author of this page has no experience with an Air Driven System, since the car on which we add the A/C system has controls driven with cables. Once you have the A/C - Heater Core Box on hand and Before you install it on the car, you can modify - renew the control cables, with correct ones. Now the controls are working satisfactory, and finally it wasn't such a very Hard To Do job. After all, you will not "play" all of the time with those controls !
Air Driven Control Panel
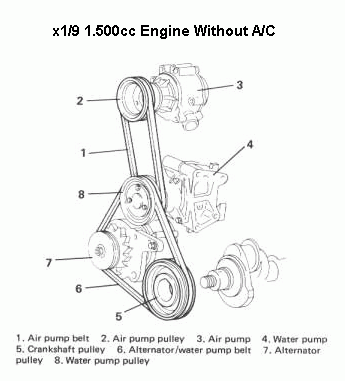
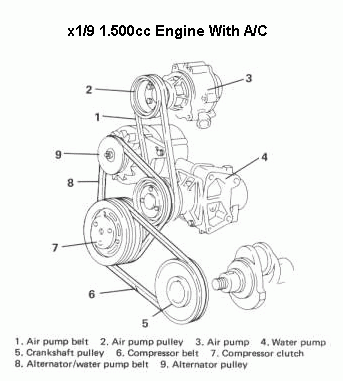
3. Install a Compressor Unit With the Base We guess that it will be easy to find a Compressor Unit WITH the Base, form a Fiat with a same Engine. The author of this page found a Compressor Unit with its Base from a Fiat Regata 1.500cc. The make and model of the Compressor found is SANDEN-4507.
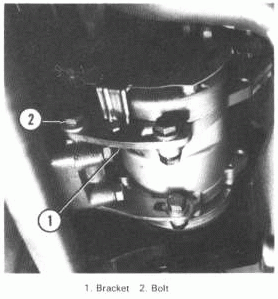
The Base - Bracket was easy to install. Please note the position for the Compressor and the new position for the Alternator. The authors' x1/9 1985 does not have the air pump. The air pump should be used to operate the Air Driven Controls of the A/C - Heater Core Box.
Note the Black Bracket that holds the Alternator.
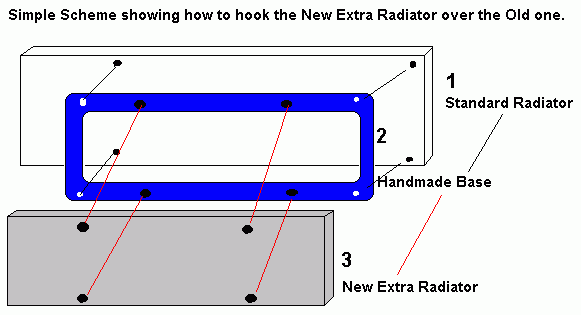
4. Add a New Extra Radiator for the A/C System We found this Extra Radiator at an Aftermarket shop, specialized in A/C parts. With a small investigation we found that prices vary from 80 to 280 euros for a same specifications Radiator. Please note that the Radiator must be very thin [about 20mm to 25mm] so it can fit in front of the Standard Radiator and between the Standard Radiator and Chassis. At this point you will need to make up a base to hook the Extra Radiator in front of the Standard one. This was easy [we cut a metal square to the scheme below, we made some holes so it could fit in the front of the Standard Radiator bolts, and some other holes so we could fit the New Extra Radiator on it].
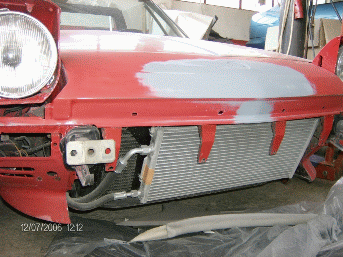
5. Add One More Radiator Fun Beside the Standard Radiator there is One Cooling Fun. The A/C System requires an additional one that it will operate whenever you activate your A/C. A good car electric supplies shop will easily locate one for you. This is an easy fit, since the Standard Radiator has Bolds, so you can hook on them the New Extra Cooling Fun. At the following photo there are 2 [factory made] funs hooked on the Standard Radiator.
6. Find a Good A/C Installation Service Find a Good A/C Installation Service so they will do the rest of the work [pipes, electrics etc]. To turn On and OFF the A/C System, all they have to do is to add a control button at your Console.
7. Add a New Battery You must add a New Battery and we guess that it should be at least 55AH.
We believe that if you do this in a Methodical Way, with No Rush and Some Patience, then it will be very easy to SUCCEED. So wishing you "Good Luck" is out of question, since Luck is not involved in this project.
|